Setup guide
This guide explains how to access Echo and get started, depending on how you subscribed.
Installing Echo
Choose how to install and access Echo based on how you subscribed.
Apple App Store subscription (iOS)
Download the Echo app from the App Store
Install and open Echo
Create an Echo account
Web subscription
Purchase your subscription via our website
Download and open the Echo app
Enter the email used during checkout
Once connected, create an Echo account
How you access Echo
Echo can be accessed in two different ways. Your setup depends on how you subscribed.
Using Echo on iOS
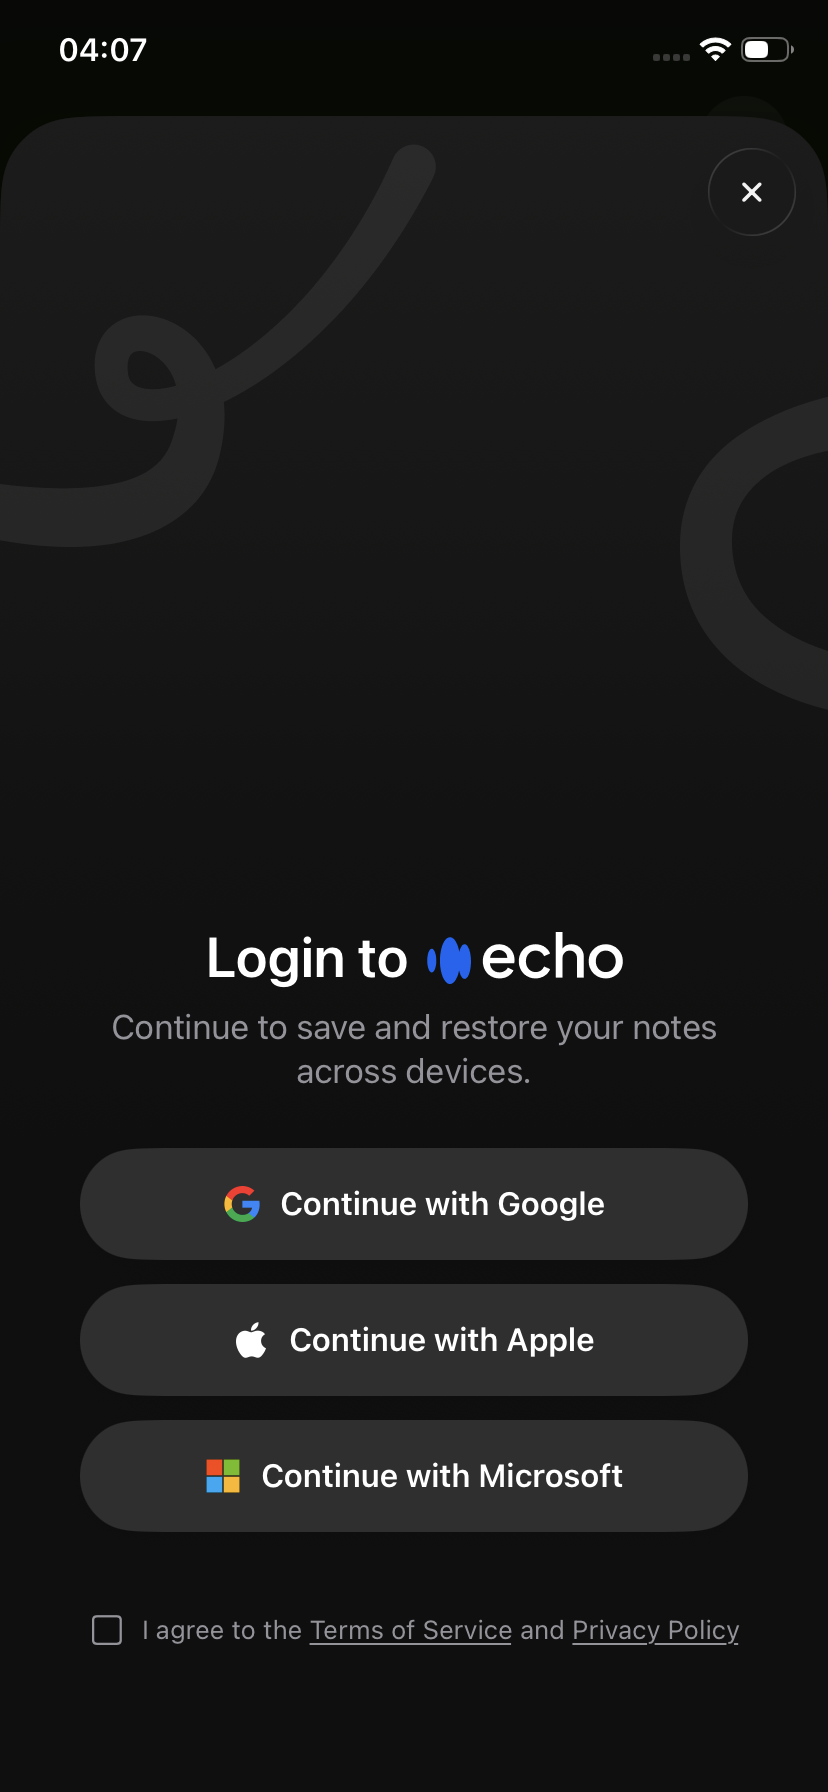
If you subscribed through the Apple App Store, you will be asked to sign into an account.
You can create an account using:
Apple
Google
Microsoft
Your account is used to store and sync your recordings and notes.
To get started:
Download and open the Echo iOS app
Sign in or create an account
You can start using Echo right away
Once you are signed in, your data will be saved to your account and available across devices.
All billing, renewals, cancellations, and refunds are handled by Apple.
Using Echo with a web subscription
If you subscribed on the Echo website, your subscription is linked to the email address you used during checkout.
To use your web subscription in the iOS app, you need to connect your email inside the app.
Step 1: Download and open the app
Download and open the Echo iOS app
If you see a payment screen, skip the onboarding:
Tap the cross in the top corner of the paywall screen
This will close the payment prompt and take you into the app
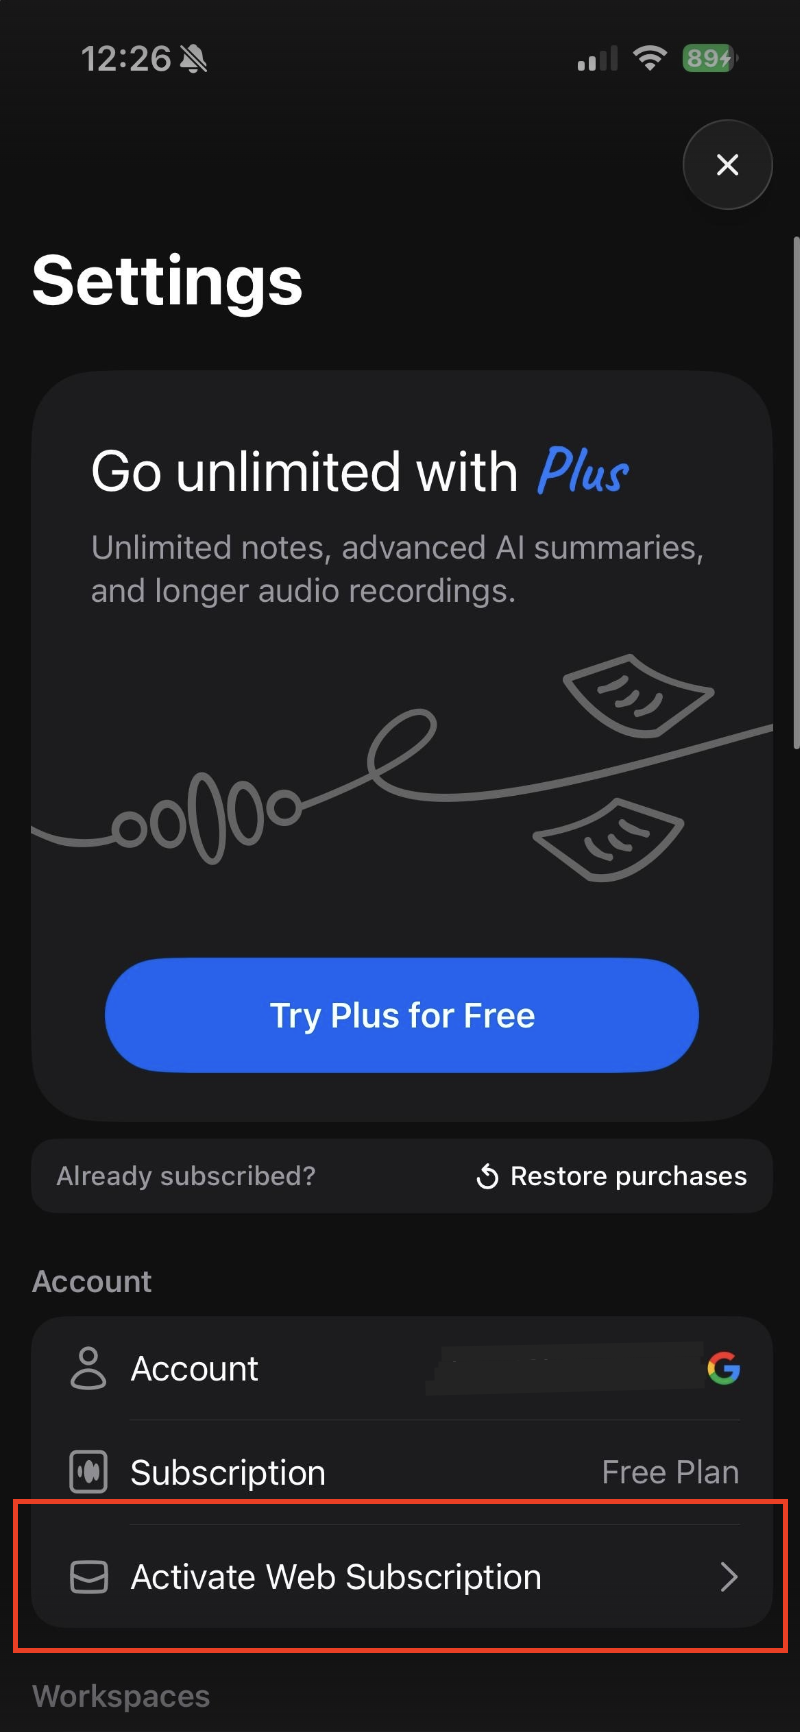
Step 2: Connect your email
Once you’re inside the app:
Tap the menu icon (three lines)
Go to Settings
Select Connect Email
Enter the email address you used when subscribing on the website
Confirm the connection
This links your existing web subscription to the app and unlocks access.
Step 3: Create an account
Sign in or create an account
You can start using Echo right away
What you need to use Echo
To use Echo smoothly, make sure you have:
The latest version of the Echo iOS app
Or a supported, up-to-date web browser
A stable internet connection
There’s nothing to install for the web version.
Your first steps in Echo
Once you’ve installed the app and signed in:
Start a new recording
Speak or capture your audio
Tap Generate Notes when finished
Wait for processing to complete
[Image 4]
Once ready, your note will include:
A full transcript
A structured summary
You can then open the note to review, edit, or export your content.
Understanding how Echo works
Echo is designed around a simple workflow:
Recording
Capture audio using your device or upload an existing fileProcessing
Echo converts your audio into text and generates structured notesReviewing
Access your transcript and summary, and export or share your content
Using Echo on multiple devices
To use Echo across multiple devices, you need to be signed in to the same Echo account.
Your recordings and notes are linked to your account, not your device.
Sign in with the same account on each device
Your notes will be available wherever you are logged in
If you are not signed in, your recordings may not be recoverable.
Important: create an account to keep your recordings safe
Creating an account is essential to ensure your recordings are securely saved.
Your notes are stored in your account
Signing in allows your data to sync across devices
It helps prevent data loss if you change or lose your device
Without an account, recordings may be lost if the app is reset, updated, or if you switch devices.
Learn more about it here: Creating an account
If something doesn’t work
If you have trouble accessing your notes or using Echo:
Make sure you are signed in to the correct account
Check your internet connection
Restart the app and try again
If the issue persists, visit the Troubleshooting section or contact support.
Next steps
Learn more about the platform in What is Echo?
Start using Echo and recording
Explore advanced features like Folders and Workspaces